
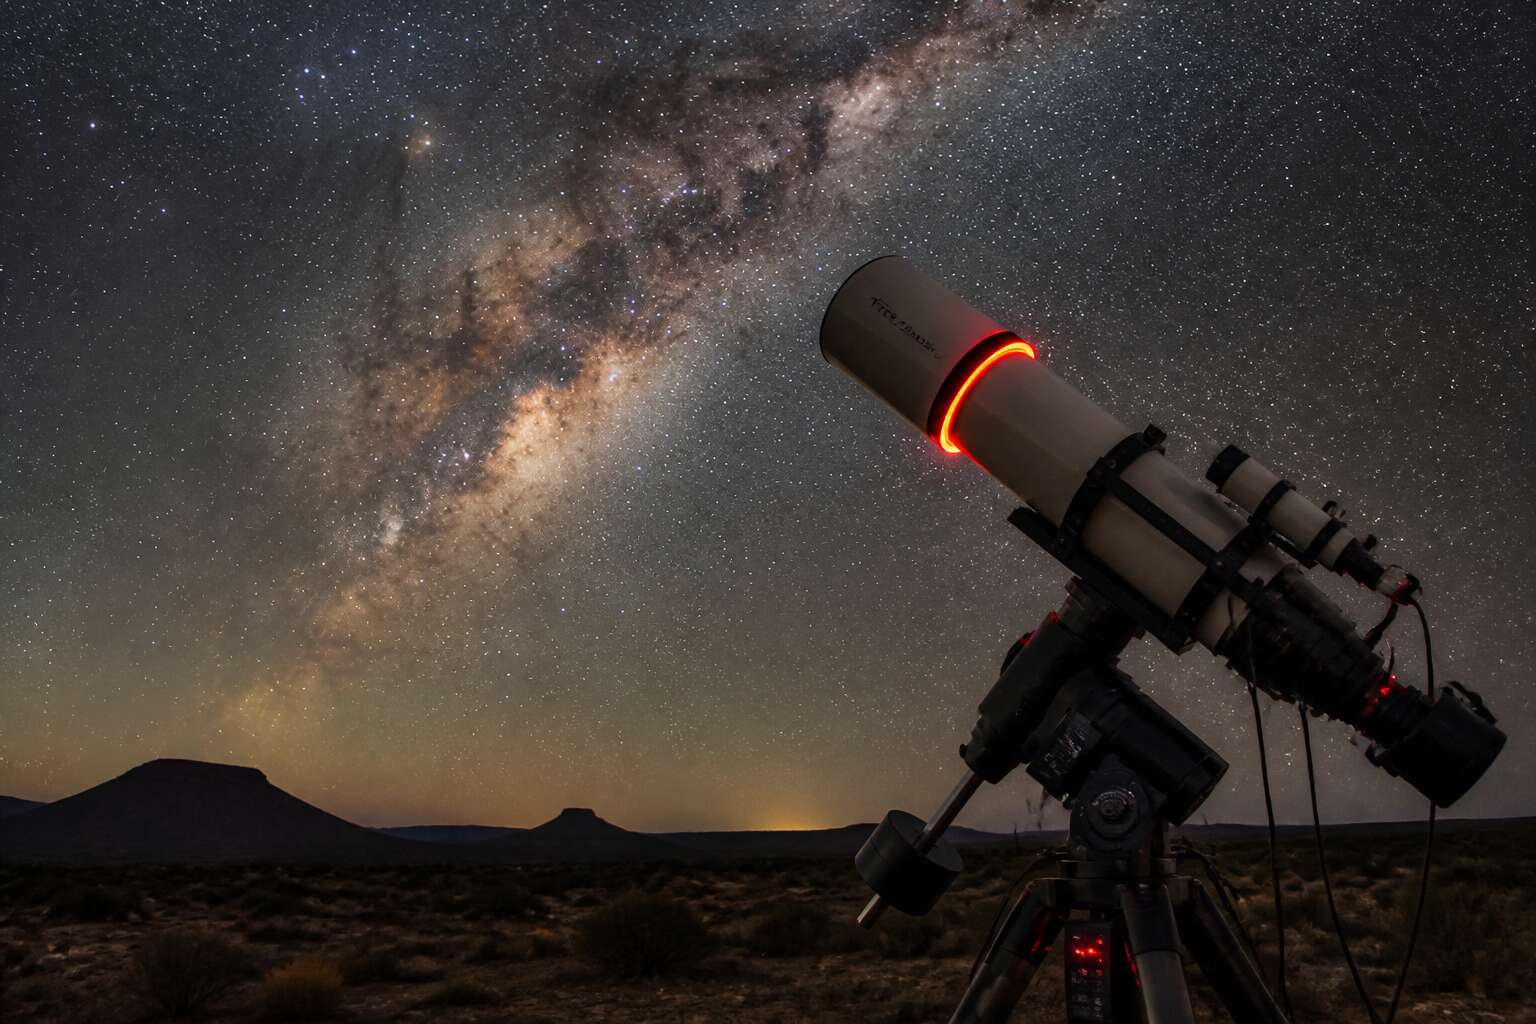
Understanding the Dew Problem for Astronomers in South Africa
Why Dew Accumulates on Optical Surfaces
Clearing skies over Sutherland often promise perfect dark skies, but within an hour, a thin film of water forms on the glass. In South Africa, the dew problem is particularly insidious because of dramatic temperature swings. A telescope’s optical surfaces radiate heat away rapidly, cooling below the surrounding air’s dew point. That is why moisture condenses even when the air feels dry.
Several conditions accelerate this process in the region:
- Proximity to coastal currents that leave humid air near the telescope.
- High altitude locations where clear skies worsen radiative cooling.
- Windless evenings after thunderstorms, when humidity lingers.
Understanding this physics is the first step before choosing a dew heater telescope South Africa. Without awareness, the finest optics become frosted mirrors, turning a promising night into a frustrating struggle.
Unique Climatic Factors from the Cape to the Karoo
From Cape Town’s sea mist to the Karoo’s icy calm, South Africa offers two very different dew battles! Along the coast, moisture arrives with the evening breeze, coating eyepieces before astro twilight ends. Inland, the same night brings a sharp drop in temperature that catches observers off guard. The western highlands behave differently from the northern bushveld, and each site demands its own strategy.
Consider what changes as you travel:
- Coastal sites see humidity spike after sunset.
- Karoo nights bring the steepest temperature curves.
- Inland plateaus have erratic wind patterns.
I always advise choosing a dew heater telescope South Africa with these variations in mind. A dew heater telescope South Africa purchased for Cape Town may fail in Sutherland, because local conditions dictate performance.
How Dew Affects Telescope Optics and Electronics
An observer in Johannesburg can lose up to 90 minutes of imaging time per night to a single dew event. That is not an inconvenience; it is a direct hit to your data collection and your patience. The problem is twofold. The first issue is optical. Minute water particles settle on the glass of your corrector plate or secondary mirror, scattering light and turning sharp stars into fuzzy blobs. A layer of dew also reduces contrast, making faint deep sky objects nearly impossible to discern. The second problem is electronic and far more insidious. Moisture creeps into the seams of your camera, focuser, and power connections.
This internal dampness causes corrosion on circuit boards and can short out sensitive components. Common failure points include:
- Autoguider ports shorting out
- Battery terminals corroding
- Dew forming on the sensor itself, ruining calibration frames
Most astronomers only discover these failures when they check their gear in the morning. By then, the damage is done. The cost of a frayed cable or a damaged camera far exceeds the investment in mitigation gear. A dew heater telescope south africa setup is not a luxury accessory; it is a fundamental piece of equipment for protecting the longevity of your rig. The secret is to match the heat output to the ambient humidity and optics size. A dew heater telescope south africa solution that works on a small refractor might struggle with a large Newtonian, and a controller that fails to adjust for the temperature swing in the Northern Cape will force you to end the session early.
Common Signs of Dew Damage in Local Observing Sessions
The first warning often arrives as a soft glow around bright stars. Beginners mistake it for poor seeing. Veterans recognise it as moisture claiming the corrector plate. By the time dew visibly beads on the glass, the damage has begun. The signs accumulate quietly through the night.
Common indicators from local observing sessions include:
- Focuser turning stiff as moisture swells the internal grease
- Finder scope fogging over while the main optics remain clear
- Star shapes elongating as dew distorts the incoming wavefront
Each symptom steals valuable imaging time. A single dewy evening in the Magaliesberg can leave a camera sensor clammy and a mount’s electronics unresponsive. The morning reveals the true cost. A dew heater telescope south africa setup prevents these signs from appearing in the first place. It maintains the optics above the dew point, keeping the night productive and the equipment dry. Observers who chart the seasons know the sky rewards preparation.
Choosing the Right Dew Heating Solution
Comparing Dedicated Heater Strips vs. DIY Alternatives
When you step outside under the Karoo’s ink-black sky, the last thing you want is a fogged objective lens. The choice between dedicated heater strips and DIY alternatives often comes down to reliability versus cost. I have seen both fail spectacularly, but for different reasons. Off-the-shelf strips, like those from local astro retailers, are engineered with even heat distribution and self-regulating wire. DIY options, such as nichrome wire wrapped around a tube, can work, yet they demand careful voltage matching and constant monitoring. Consider these factors:
- Current draw: dedicated strips are matched to your battery capacity, DIY ones often drain power unpredictably.
- Heat consistency: manufactured units maintain steady temperature across the glass, while homemade wraps create hot spots.
- Warranty and support, which matters when you are far from a replacement source.
A hybrid approach, using a dedicated controller with a DIY strap, can save money without sacrificing safety. Either way, ensure your dew heater telescope south africa setup is tested before a long imaging run. The cape mist rewards preparation, not improvisation.
Key Specifications: Wattage, Control, and Temperature Sensors
Wattage dictates whether your optical tube stays clear or drifts into fog. For a dew heater telescope south africa setup, matching heat output to glass mass and ambient humidity is non-negotiable. A 10 watt strip suits a small refractor, while a 14 inch Schmidt Cassegrain may need 30 watts.
Control matters just as much. On/off switches are crude, and I have rejected them entirely. True regulation, via a pulse width modulated controller, maintains a steady thermal plateau. Temperature sensors, placed on the lens cell or mirror edge, close the loop. They react to moisture changes before condensation forms.
- Wattage should match the thermal mass of the objective.
- Closed loop controllers adjust power based on sensor feedback.
- Sensor placement affects response time.
Attention to amperage draw and connector quality matters. Warm cables indicate resistance problems, not success. A properly tuned dew heater telescope south africa solution stays quiet until you need it.
Selecting a Heater for Refractors, SCTs, and Newtonians
A refractor and a Newtonian demand completely different heat layouts. The glass sits in a sealed tube on one, an open frame on the other. This determines where your heater strips go.
For a refractor, wrap the heater around the lens cell or dew shield. For a Schmidt Cassegrain, fit a ring around the corrector plate. For a Newtonian, direct heat at two spots: the secondary mirror and the primary mirror. The secondary fogs first, so prioritize it.
I have watched observers mount a single strip to the Newtonian tube and still lose the secondary to condensation. The warmth never reached the glass.
Typical configurations for a dew heater telescope south africa setup:
- Refractor: a 5 to 10 watt strip on the lens cell.
- SCT: a 20 to 30 watt ring on the corrector.
- Newtonian: a focused radiant heater near the secondary.
Coastal skies near Cape Town are wetter than the Karoo interior. Match your heater to local humidity, not to what a friend uses inland.
Battery Power and Portable Drying Solutions for Remote Sites
The moment arrives when the visible dew evaporates, yet a damp, greasy sheen remains on the glass. That residue is the real enemy. At a remote Karoo site, power is a finite resource. Your dew heater telescope south africa setup will only perform as well as the battery behind it. A 30 watt ring draws roughly 2.5 amps per hour. A single 12V, 38Ah lithium battery will comfortably run that for a full night, but only if you measure the load. Bring a watt meter and log your total draw before you leave the city.
Cable resistance matters more than you think. Thin 18 gauge wire over a fifteen metre run can drop a full volt. That voltage loss saps your heater’s power precisely when the humidity peaks. See the list below for a more reliable pairing.
1. A 50Wh power bank for the controller only.
2. A deep cycle battery for the heating elements.
3. A DC to DC converter to stabilise voltage.
This stacks your energy reserves so a condensation event on the primary mirror never demands power the secondary heater already consumed. For supplemental drying, a portable 12V desiccant drier will clear a fogged eyepiece in two minutes. You can also use it to dry a dew cap before you pack away at dawn, stopping corrosion from forming inside the tube. That routine is essential in this climate, where a night of Mount Nelson cloud can undo weeks of careful collimation.
Budget-Friendly Options for Beginner Stargazers
Seventy percent of telescope dew failures happen in the first hour of a Karoo night. Many a beginner mistakes dew for poor seeing, then packs away a soaked corrector plate. Choosing a dew heater telescope south africa solution does not require an observatory budget. Start with a single self regulating strip for your primary optic. Skip the multi channel controller until you own more than one scope. For budget friendly setups, keep this hierarchy:
– Protect the optical surface first.
– A simple resistor strip beats a smart controller with no strip.
– Spend your remaining rand on a battery.
The cheapest heater that fits your aperture gives you clear optics. The first night of clear observing teaches more than any specification sheet!
Weatherproofing and Durability for High-Humidity Environments
Moisture attacks the cure as vigorously as the disease. A dew heater telescope south africa setup in a coastal garden faces salt laden air, while inland highveld thunderstorms bring their own humidity. Barrel connectors rust, adhesive peels, and controllers fail without warning. The dew heater itself becomes the next casualty.
Weatherproofing separates a smart purchase from a short term fix. We have seen controllers fail after one coastal summer. Reputable manufacturers test for condensate ingress and seal their control units. The strips need flexible insulation that resists cracking when wrapped around a Schmidt plate. For anyone investing in a dew heater telescope south africa, fragile components fail on both fronts. The units that survive humid evenings tend to feature:
- Potting compound on the electronics
- Nickel plated contacts that resist corrosion
- Double layered heat strips with a moisture barrier
That combination costs more, but keeps equipment functional through the wet season. The real choice is between repeat purchases and one solid investment.
Installation and Usage Best Practices
Step-by-Step Mounting Techniques for Front Lens and Eyepieces
Mounting a heater demands attention to fit and airflow. The front lens cell and eyepiece barrels each require a specific strap tension, secure enough to hold position yet gentle enough to avoid stressing the coatings. For any dew heater telescope South Africa setup, the sequence matters as much as the hardware.
- Secure the primary strap around the lens cell hood.
- Route the power cable away from the focuser.
- Attach the eyepiece band heater with a slight overlap.
- Test the connection before darkness falls.
In the Cape’s damp evenings, a poorly seated strap can loosen as the telescope tilts across the sky. The Karoo’s dry air presents a different challenge, where dust collects under a loose band. A correct installation stays quiet, no rattles, no sagging, no intermittent power loss. A well mounted dew heater telescope South Africa observers trust performs all night without complaint.
Using Controllers and Thermistor Feedback Efficiently
Here is a confession: I ran my heater at full power for a year. A friend pointed out that I was fighting the sky instead of reading it. The thermistor exists for a reason. It senses the optic temperature relative to the ambient air and lets the controller hold the dew point at bay. Without feedback, you are guessing in the dark.
For a dew heater telescope South Africa observer, the efficient path is to set the temperature delta once and trust the loop. The thermistor must sit where the dew forms, not on the heater strap. That placement is everything.
I have found that a few practices matter:
– verify thermistor contact with the optic before each session
– allow the controller to stabilise for ten minutes
– adjust the delta in small increments
The result is a system that works quietly through the dampest Cape night.
Preventing Overheating and Extending Heater Lifespan
Installing a dew heater telescope south africa setup requires restraint. A strap wound too tightly pinches the corrector and transfers heat unevenly. One left too loose will drift and burn a warm spot onto the wrong side of the optic. Even contact between strap and glass prevents these complaints.
Overheating shortens the life of heater straps. The wire elements inside become brittle after hours at maximum output, and the adhesive backing loses its grip once temperatures climb. I run a simple check: power up, wait ten minutes, and feel the strap. Warm is fine. Hot is a warning.
Lifespan also depends on the user’s manners. Store the strap dry, coil it loosely, and keep connectors free of moisture. Unplug before removal. Wipe it down after each session. A silent routine earns a heater that lasts winters from Cape Town to Sutherland without complaint.
Where to Buy Dew Heaters in South Africa
Leading Local Telescope Retailers in Johannesburg and Cape Town
When the Cape fog settles without warning, the difference between a productive night and a wasted one is often an electrical cord. A dew heater telescope south africa purchase no longer requires ordering from abroad and waiting weeks for shipping. Dedicated optical retailers in the country’s two largest cities hold real stock, ready for immediate collection.
- Johannesburg: Absolute Photo Video in Sandton keeps a range of heater strips, controllers, and spare connectors behind the counter.
- Cape Town: Orion Optics offers a specialist selection, with staff who can demonstrate fitting techniques on your actual telescope.
Visiting a physical store lets you check connector sizes and cable lengths before spending money. We have purchased from both and recommend a quick phone call before travelling. Both shops can arrange overnight courier delivery to remote observing sites like Sutherland or the Karoo. Their staff understand how a dew heater telescope south africa behaves when humidity climbs past 80 percent at midnight, and they will steer you toward the right wattage without upselling.
Specialist Astro Shops vs. General Outdoor & Camera Stores
Choosing where to buy a dew heater telescope south africa matters more than the price tag. Specialist astro shops carry equipment designed for optical surfaces, while general camera and outdoor stores often stock generic warming pads meant for lenses or hands. These generic options may fit, but they lack the controllers and thermistor feedback that regulate heat output at midnight.
Specialist shops also understand local conditions. They know that a dew heater for a SCT in Cape Town’s coastal fog differs from one used in the Karoo’s dry cold. Their staff can advise on wattage and cable length without pushing a brand. General stores cannot match that depth.
- Accurate sizing for your telescope model
- Controllers that adjust to humidity changes
- Spare connectors and cables in stock
For a reliable purchase, visit a dedicated astro dealer. That is where the real expertise lives.
Top International Brands Available in South Africa
Three international names cover nearly every serious purchase in South Africa: Kendrick, AstroZap, and Dew-Not. Local distribution means proper warranty support, a relief for anyone who has waited six weeks on an import. That edge matters when a heater cable fails at 2 AM in Sutherland.
Buying a dew heater telescope south africa means weighing two tiers. Kendrick owns the premium end with heavy duty controllers and thermistor feedback. AstroZap makes pre-shaped strips for specific tube sizes. HitecAstro offers the budget path without sacrificing basic build quality. These three names come up most in forum discussions.
Cape Town and Johannesburg dealers stock them, though shelf inventory moves fast and rare items demand a phone call. I have learned to call ahead.
Ordering from Amazon and eBay: Customs and VAT Considerations
Local dealers remain the first option, but their shelves empty quickly. When a specific dew heater telescope south africa unit is out of stock, Amazon and eBay tempt you with lower prices. The savings shrink after customs and VAT. SARS charges import VAT at 15% and duties vary by category. Courier companies add clearing fees, sometimes R500 or more. I have watched a R350 saving disappear under those fees.
The final landed cost depends on variables beyond the listing price:
- Voltage compatibility with South Africa’s 230V grid
- Shipping method, either SAPO or a private courier
- Duty classification for electronic heating equipment
- Warranty coverage for repairs outside the seller’s country
One advantage of local stock is support. A controller that fails after three weeks hurts less when a Johannesburg dealer can swap it out.
Second-Hand Marketplaces and Astronomy Forums
A single dew heater telescope south africa setup can cost as much as a decent eyepiece, so the used market deserves a look. Many local observers upgrade their gear and list perfectly functional controllers and straps on Facebook groups dedicated to astronomy. The prices there often undercut retail by a noticeable margin, and you can ask the seller directly about its history. Nobody knows a heater’s quirks better than the person who used it monthly under the Highveld sky.
Forums like the ASSA community boards are another hunting ground. Members sometimes sell equipment parts in a quiet corner, often advertising to a trusted circle. The advantage is the institutional memory. A seller can tell you if a unit coped with a humid Cape winter or ran hot in Durban. This local knowledge matters. When searching for a second-hand dew heater telescope south africa deal, consider these points:
– Ask for photos of the connector pins and the controller screen for signs of wear.
– Confirm the input voltage matches your 230V mains supply or 12V battery system.
– Request the original packaging; dew heaters are fragile despite their simple look.
– Inquire about the seller’s observing site conditions to gauge real-world performance.
The downside is that used electronics can become a minefield of frayed cables and dead sensors. You trade warranty for savings, which works fine if the price reflects the risk. For a beginner, a new unit from a dealer offers certainty. For the seasoned observer, a second-hand bargain from a fellow stargazer often becomes the most reliable piece of gear in the kit. The market floats on trust, and in South Africa, that trust travels quickly through the grapevine of passionate astronomers.
Integrating Dew Heaters into Your Observing Routine
Setting Up an Automated Dew Prevention System
Fog on a corrector plate ends the night faster than any equipment failure. A dew heater telescope south africa setup needs a fixed place in your starting sequence, not a hopeful guess.
I wire my heater directly to the mount’s battery switch. The moment I power the mount, the heater warms the glass. This automatic start happens before I even remove the dust cover. The optics reach a stable temperature while I align the finder.
For a complete automated system, keep the components simple:
- Heater strip sized to the objective
- Power relay connected to the mount’s 12V line
- Inline fuse for safety
Once installed, the system runs itself, freeing you to focus on the sky!
Seasonal Strategies for Summer Thunderstorms and Winter Nights
Summer thunderstorms leave moisture that settles on every optical surface within minutes. I switch on my dew heater telescope south africa setup before the first star appears, not after the corrector plate fogs. Winter nights bring a different enemy: cold glass meeting warmer, moist air near the Cape coast. The heater works harder, yet the routine stays constant.
My seasonal checklist is short:
- Check the controller’s thermistor against the ambient temperature
- Power the heater fifteen minutes before opening the dust cover
- Raise wattage only when the dew point approaches air temperature
Most observers discover a fogged lens ends the evening. For any dew heater telescope south africa owner, the ritual bends to the season, not the other way around!
Routine Checks and Cleaning After a Dehumidified Session
Routine checks after a dehumidified session matter as much as the heating itself. Dust settles on warm surfaces first. I keep a soft brush and microfibre cloth in the observatory, not in the house. Each inch of the corrector plate gets a gentle wipe in one direction.
A simple checklist keeps the gear honest:
– Inspect the heater strip for kinks or moisture intrusion
– Wipe the controller contacts with a dry cotton bud
– Store the dew heater telescope south africa unit with the cap on and silica gel nearby
The dehumidified session ends with the battery disconnected and the controller returned to zero. That small discipline protects the elements for the next Cape night.
Combining Dew Heaters with Lens Hoods and Heated Dew Shields
A lens hood alone only delays dew. The real gain comes from pairing it with a heated dew shield, which pre-warms the air column in front of the glass. I set my dew heater telescope south africa controller to a low baseline, then let the thermistor fine-tune the wattage. The heating strip works with the shield to raise the optical surface temperature slightly above the dew point. On the Cape coast, this combination has saved many nights of imaging.
For eyepieces and finders, I use small collars on the same controller. A simple routine before each session:
- Fit the heated dew shield over the objective
- Attach the heater strip to the shield’s interior
- Check the controller’s battery voltage
This integration keeps the entire optical train dry without wasting power.
0 Comments