
Evaluating Aperture and Performance
Why 200mm is a Sweet Spot for Amateur Astronomy
A 200mm telescope gathers roughly 800 times more light than your unaided eye, yet it remains small enough to fit in a hatchback. For the 200mm telescope south africa crowd, that combination is pure practicality. The aperture sits in a useful middle ground.
Amateur observers here face specific challenges: turbulent thermals over the veld, urban glow from Joburg and Cape Town, and the occasional baboon eyeing your eyepiece. 200mm handles these conditions with grace. It resolves detail on Jupiter without turning your observing session into a wrestling match.
- Dobsonian mounts make setup effortless
- Secondary mirror shadows stay negligible
- Focal ratios around f/6 offer wide views
My own stargazing improved the day I stopped chasing aperture and accepted this sweet spot.
Light Gathering Ability and Resolution
The area of a mirror determines how deep you can see. A 200mm telescope South Africa collects 2.4 times more light than a 130mm, which shifts the limiting magnitude from 12.5 to 13.5 under identical skies. Light gathering follows the square of the aperture, so every extra millimetre counts.
Resolution operates separately from light gathering. The theoretical limit for 200mm sits near 0.7 arcseconds, but the atmosphere over the South African interior often caps it at one arcsecond. I have found that thermal stability influences what you see more than glass quality does.
Test both properties on real targets. A 200mm telescope South Africa reveals the Cassini Division on Saturn and the two main belts of Jupiter when seeing permits. For a quick assessment:
- Split Alpha Crucis in the Southern Cross.
- Track a shadow transit of Jupiter’s moon Io.
- Trace the dust lane of Centaurus A.
Portability vs. Capability Trade-offs
Every aperture demands a trade-off. A 200mm telescope south africa requires a sturdy mount and a car boot with space. I have watched observers at Sutherland struggle with 300mm assemblies while a 200mm tube sat ready in ten minutes.
When evaluating aperture, the star test matters more than any specification. A bright star just outside focus reveals spherical aberration through the shape of the diffraction rings. The Moon’s terminator exposes chromatic error instantly. Collimation drift becomes obvious after a bumpy dirt road.
The 200mm telescope south africa offers capability without demanding a permanent observatory. It fits in a sedan, heaves onto a mount without assistance, and still resolves the Eta Carinae nebula’s dark keyhole. Portability is capability, because a telescope that stays home sees nothing.
Navigating South African Conditions
Highveld vs. Coastal Observing Sites
At 1,500 metres above sea level, the Highveld’s air holds less moisture, which helps any 200mm telescope south africa owner chasing faint deep sky objects. Yet the plateau’s daytime heating produces turbulent air columns by nightfall.
Coastal sites face the opposite problem. The marine layer brings humidity that dews up optics quickly, but the ocean breeze often delivers remarkably stable seeing. I have observed from both, and neither condition is inherently superior!
The Highveld rewards patience, the coast rewards preparation. A 200mm telescope south africa user must choose which nuisance to manage, thermal wobble or dampness. Both demand a clear understanding of your local weather patterns.
Weather Patterns and Seasonal Viewing
South African skies follow their own calendar, and serious observers learn it quickly. In Gauteng, the summer thunderstorm season produces towering afternoon cumulus, but those storms cleanse the air and often deliver pristine transparency after midnight. The Highveld winter offers months of cloudless nights, yet the chill causes thermal currents to swirl around a 200mm telescope south africa until the glass reaches ambient temperature.
Cape skies behave differently. The south-easter in summer whips the air into turbulence, while autumn and winter bring berg winds and the remarkable clarity that follows a cold front. The Western Cape’s winter rainfall actually creates some of the finest viewing windows because post-frontal air is dry and stable.
Seasonal markers for 200mm telescope south africa owners:
- April to June: the most settled transition nights
- July to August: cold, dry, and shorter observing hours
- December to February: long, humid nights with scattered clear breaks
Light Pollution in Major Cities
Light pollution in Johannesburg and Pretoria produces a combined urban glow visible from the Magaliesberg. Cape Town’s sprawl washes out the southern horizon from most suburban yards. Durban’s humidity scatters artificial light further, making the night sky appear brighter than it should.
For a 200mm telescope south africa owner, the difference between frustration and productivity often comes down to geometry. Jupiter’s moons survive a bright sky; faint deep sky objects do not.
I keep a mental map of dark pockets within an hour’s drive. The Magaliesberg escarpment, the Rietvlei environs, and the hills above Durbanville all offer better horizons than inner suburbs.
Some practical tactics:
– Point the tube away from the brightest urban cores
– Use a light shroud to block street lamp glare
– Plan around the moon cycle and satellite passes
A 200mm telescope south africa operated from a shaded patch of garden still finds useful targets, provided the observer reads the sky’s local shadows.
Best Dark Sky Reserves in South Africa
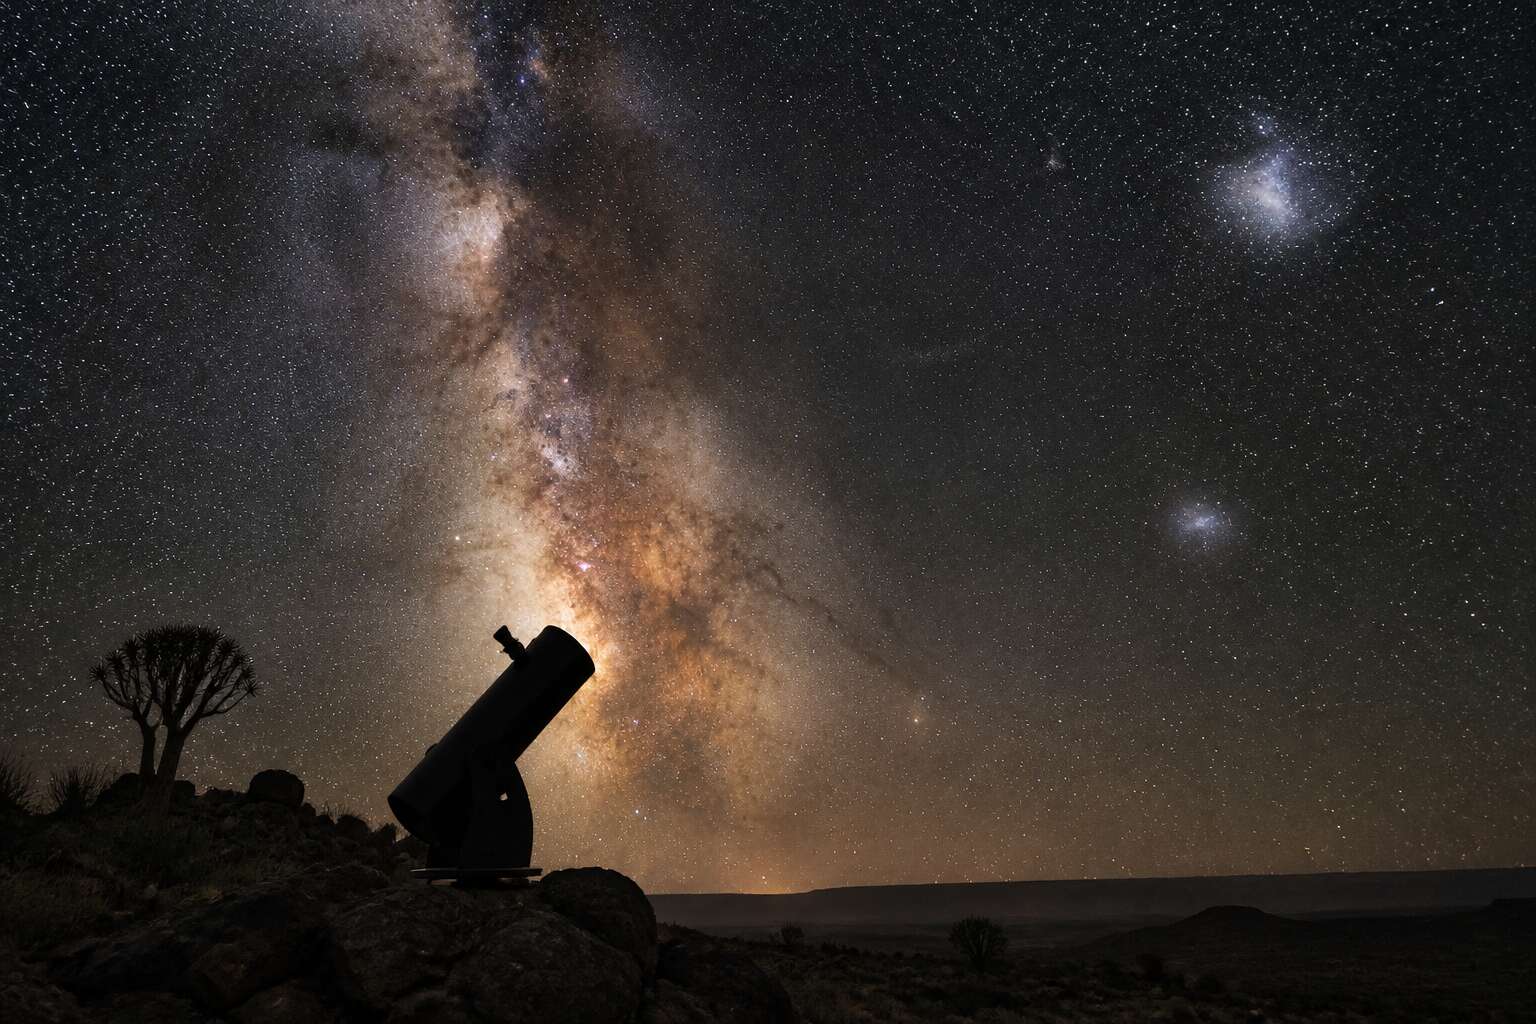
Some of the finest stargazing on the continent happens in Sutherland. The town sits high on the Roggeveld Plateau, at 1,450 meters. It is also one of South Africa’s designated dark sky reserves. For anyone hauling a 200mm telescope south africa, this Karoo location offers a rare commodity: an unobstructed, ink-black canvas free from urban luminescence. The seeing conditions there are so consistent that the Southern African Large Telescope was built nearby, and the night sky carries a crystalline stillness rarely found elsewhere.
The logistics are straightforward. From Cape Town, Sutherland is roughly a four-hour drive. You arrive at a destination where the milky way generates its own shadow and the Large and Small Magellanic Clouds hang like detached pieces of the galaxy. A 200mm telescope south africa operates near its theoretical limit when atmospheric turbulence drops. In the dry Karoo air, the seeing often does drop, allowing high power views of Jupiter or the Eta Carinae Nebula without the watery shimmer common at the coast.
Practical advantages of a reserve like Sutherland:
– Low humidity prevents dew from fogging optics
– No artificial skyglow allows faint details in globular clusters to emerge
– Predictable, cloudless winter nights align with the school holidays
The observing experience has a physical component as well. Daytime heat radiates quickly from the semi desert plateau. By midnight, the air is frigid and perfectly calm. The result is a level of clarity that makes a ten inch mirror feel like a much larger instrument. Northern constellations like Orion rise higher in the sky at this latitude, offering more usable observing hours during summer. The quiet also helps with focus. No sirens, no neighbours’ floodlights, just you, the telescope, and the deep focus required to tease out faint detail. For a 200mm telescope south africa enthusiast, the trip is not a luxury. It is a necessary pilgrimage.
Selecting the Right Mount and Optical Design
Dobsonian vs. Equatorial Mounts for Large Reflectors
For many South African stargazers, the mount choice matters as much as the mirror itself. A 200mm telescope south africa based purchase often defaults to a Dobsonian, and for good reason. This design gives you the largest aperture per rand, with a simple altazimuth base that is intuitive to operate. You point, you look, and you are rewarded with crisp views of the southern sky’s treasures.
Equatorial mounts tell a different story. They add weight and setup time, but they track the rotation of the Earth with a single axis of motion. If you plan to image deep sky objects in the Karoo, an equatorial mount is essential. However, the added complexity can be a burden for a beginner.
– Dobsonian: best for visual observation and quick setup.
– Equatorial: best for astrophotography and guided tracking.
– GoTo systems: useful for finding faint objects automatically.
– Manual tracking: a skill worth learning, but can be frustrating.
Think about how you will actually use a 200mm telescope south africa under Highveld conditions. A solid Dobsonian with a good focuser will provide years of satisfaction. An equatorial mount might promise more, but it demands patience and regular maintenance. You have to decide whether you want a hobby or a project.
Newtonian vs. Catadioptric Tubes
The most honest question a South African buyer can ask is not about aperture, but about the tube itself. Newtonian reflectors use a primary mirror at the base and a small secondary mirror to bounce light to the eyepiece. This simple arrangement offers excellent contrast on lunar craters and the Magellanic Clouds. A 200mm telescope south africa purchase with a Newtonian design gives you more light for every rand spent. The tube remains open to the air, which allows it to cool down quickly on a Highveld evening.
Catadioptric tubes, such as Schmidt-Cassegrains, fold the light path with a corrector plate. This creates a compact package that fits easily into a sedan boot for trips to Sutherland. They deliver a longer focal length in a shorter physical tube, which suits planetary observation. However, they take longer to reach thermal equilibrium after sunset.
– Newtonian tubes: lower cost per inch of aperture
– Catadioptric tubes: compact and versatile
The choice between these optical paths changes your observing routine. A Newtonian rewards patience and frequent use. A catadioptric offers portability and adaptability. For a 200mm telescope south africa owner, this decision shapes every session under the sky. Consider which compromise aligns with your nights out, and let that guide your hand.
Go-To Features and Tracking Accuracy
Tracking accuracy is measured in arcseconds per minute. A basic mount might deliver ten; a premium mount on a 200mm telescope south africa might deliver one. That gap shows up when Jupiter’s banding shudders at high magnification or when a long exposure of the Carina Nebula captures star trails instead of stars.
Go-To features add another layer. A hand controller with a 40,000 object database can slew to NGC 2070 in seconds, but the mount’s optical encoders must confirm the final position. Without good tracking accuracy, the Go-To system only delivers an approximate view that drifts away.
The right mount for the 200mm telescope south africa buyer balances these elements:
- Periodic error correction or the ability to program it manually
- Backlash compensation for smooth direction changes
- A polar alignment routine that fits your site
Each feature influences tracking accuracy. I have found the optical design matters less than the mount’s mechanical character.
Weight, Setup Time, and Storage
There is a moment every 200mm telescope south africa owner knows: the first heave of the mount head out the door. A twenty kilogram equatorial head is manageable, but a thirty kilogram one tests your patience at 2 AM.
Optical design sets the weight budget. A thin walled Newtonian tube is light, yet its length catches wind. A catadioptric is compact and stiff, but heavy. The mount must carry both tube and camera without complaint.
Setup time also shapes your choice. Consider these factors:
– How far the gear travels from storage to observing spot
– Whether the tripod legs need leveling each session
– How many counterweights must be threaded on
Storage matters in this climate. Highveld mornings bring dew; coastal air brings salt corrosion. A 200mm telescope south africa that lives in a garage needs sealed electronics and a dry tube.
Budget Considerations for Local Buyers
The true cost of a 200mm telescope south africa reveals itself only when the mount meets the night sky. A magnificent tube on a wobbly mount is a handsome dinner guest who cannot dance. Local buyers, watching the rand fluctuate, often fixate on the optical tube while ignoring the far less glamorous mount. This is how telescopes become ornaments. The discerning purchaser knows that a modest tube on a rock solid mount outperforms a large aperture rocking in the breeze. South Africa’s import duties and shipping costs demand respect.
- Imported mounts carry hefty freight and customs charges
- Local warranty claims are simpler when the dealer has a physical address
- The second hand market attracts both bargain hunters and the overly optimistic
Budget debates among seasoned observers rarely end in agreement. Some argue that glass deserves every cent, while others insist that a stable base is the only honest investment. The most contented owners tend to have inverted priorities, a sensible mount and a modest tube, and they are seldom seen requesting help on astronomy forums.
Essential Accessories for Maximum Enjoyment
Eyepieces and Barlow Lenses for Extended Focal Lengths
The exit pupil narrows as the night deepens. For a 200mm telescope south africa, the eyepiece dictates how much faint light reaches your eye. A 25mm ocular provides wide fields for nebulae, while a 10mm pushes magnification toward the Moon’s craters. Each choice depends on the seeing conditions.
A Barlow lens extends focal length without new glass. Slip a 2x Barlow beneath a 12mm eyepiece, and you own a 6mm high-power view. This flexibility proves vital when atmospheric turbulence caps magnification at 200x. You adjust rather than abandon.
Quality matters. Poorly coated Barlows scatter starlight into glare. Choose a three-element design for clarity. The result serves every object the southern sky offers.
Finderscopes and Red Dot Finders
Locating a faint nebula with a 200mm telescope south africa starts before the eyepiece. The finder is the critical link between the star chart and the main tube. Many beginners skip this accessory and then struggle against the narrow field of a high-power view. A red dot finder imposes no magnification; it simply overlays a glowing point on the sky, ideal for aligning to bright stars. When a target sits in a dense Milky Way field, a finderscope with 8×50 aperture shows the surrounding pattern and enables confident star-hopping.
Options vary by ergonomic preference:
- Red dot with adjustable intensity
- Straight-through achromatic finderscope
- Right-angle correct-image version for zenith work
The right approach matches your observing style. A red dot plus a 8×50 finderscope covers most southern evenings without clutter!
Filters for Lunar and Planetary Observation
Even a modest 200mm telescope south africa gathers enough light to make the full Moon painfully bright. A neutral density filter removes that glare while preserving surface detail. Believe me, without it, lunar observing becomes a squint. With it, you can study the terminator for hours without fatigue.
For the planets, color filters serve a different purpose. A 25 red filter darkens the sky around Mars and emphasizes the polar caps. A 80A blue filter brings out the cloud belts on Jupiter. The expense is trivial. The gain is a more comfortable, detailed view.
- Neutral density filter for lunar glare
- Wratten 25 red for Mars
- Wratten 80A blue for Jupiter and Saturn
A 200mm telescope south africa rewards patience, and filters are part of that patience. They do not add light. They subtract what obscures. That clarity keeps you at the eyepiece longer.
Collimation Tools for Reflectors
Transport is rough on a Newtonian reflector. A 200mm telescope south africa that was perfectly aligned in the showroom can arrive with the secondary mirror knocked out of position. The fix is simple. Collimation tools.
Every reflector owner should have at least one of these:
- Cheshire eyepiece. Cheap, precise, and nothing to break.
- Laser collimator. Faster, but verify its own alignment first.
- Autocollimator. For fine-tuning the secondary mirror.
You do not need all three. A Cheshire eyepiece handles most jobs. A laser speeds things up. The skill is worth learning because an out-of-collimation 200mm telescope south africa delivers soft stars and mushy detail. Five minutes with a tool beats a frustrating night at the eyepiece. The small cost buys consistent sharpness on every target.
Dew Shields and Climate Protection
A night in Sutherland can drop below freezing while the sky stays crystal clear. Then the dew arrives. I have watched a pristine mirror fog over in twenty minutes, and that was the end of the session. A 200mm telescope south africa collects enough light to show detail on Mars, but only if the optics stay dry. A long dew shield is the first line of defence. It slows condensation and keeps stray light off the glass.
For coastal observers near Cape Town or Durban, salt air is the bigger enemy. Wipe down the tube and eyepieces after every session. Keep the caps on between targets.
Things that save a night:
– A dew heater band for stubborn Highveld humidity
– A simple hairdryer, held at arm’s length
– A waterproof cover for sudden thunderstorms
The small investments protect your 200mm telescope south africa for decades.
Camera Adapters for Astrophotography
Pairing a camera with a 200mm telescope south africa opens a new way to capture the night sky. A T-ring matched to your camera brand and a T-adapter for prime focus are the core essentials. Remove the eyepiece, insert the adapter, and the full focal length reaches the sensor. This works for the Moon and bright planets!
- Canon, Nikon, and Sony T-rings are available locally
- Confirm back focus distance before buying a motorised focuser
For deep sky objects, a field flattener or coma corrector is worth the cost. I have seen beginners produce crisp shots of Jupiter with a smartphone, but a proper adapter delivers better results. Invest in solid metal connections. A flimsy plastic adapter causes image shift and frustration on cold Sutherland nights.
Where to Buy and Get Support in South Africa
Trusted Local Astronomy Retailers
When you invest in a 200mm telescope south africa, the relationship with your supplier matters as much as the optics. A trusted local retailer understands the Highveld weather patterns and the salt-laden coastal air, offering advice that a foreign warehouse cannot match.
Look for dealers who stock reputable brands, offer after-sales support, and can demonstrate equipment. They should also provide:
- Practical guidance on mount setup and go-to calibration
- Access to warranty repairs within South Africa
- Advice on storage that suits your specific climate
These services protect your investment beyond the initial purchase. The right seller becomes a long-term partner in your observing journey.
Online Marketplaces and Import Options
Online marketplaces present tempting prices for a 200mm telescope south africa, but those numbers hide real costs. Import duties, courier fees, and insurance can push the final amount past what your local dealer charges. Worse, a defective mirror means shipping the tube back overseas. That return journey often takes months and lands in customs limbo.
I have seen buyers save a few hundred rand on the initial purchase, then lose it all on return shipping. Support becomes a chain of email threads that stretch across time zones. When browsing local online platforms, check the seller’s physical address and stock levels. Many advertise imported models they never actually hold.
Consider these points before buying imported:
- Verify voltage requirements for any electronics.
- Confirm the warranty covers South African repair centres.
- Factor the exchange rate into your final budget.
Importing a 200mm telescope south africa works if you accept the risk. Pair it with a service plan from a local technician, and you will have both the savings and the backup.
Second-Hand Market and Telescope Clubs
The second-hand market rewards patience. Many experienced observers upgrade their scopes regularly, which means used units appear often. A pre-owned 200mm telescope south africa can offer superb value if you inspect it properly. Shine a flashlight down the tube to check the mirror’s coating. Ask the seller when they last collimated it. A stored telescope outlives its first owner without losing performance.
Telescope clubs are the hidden backbone of local support. The Johannesburg and Pretoria astronomy societies host monthly observing evenings where members bring their 200mm telescope south africa models for side by side comparison. These gatherings are where you learn which local technicians handle mirror recoating and which retailers honour warranties without resistance. The conversations are honest because nobody is selling anything. I have watched newcomers diagnose collimation issues in minutes simply by watching a club member demonstrate the process. That informal education is worth more than any manual.
What to ask club members when you meet them:
– Which eyepieces pair well with your focal ratio
– Whether a specific dealer’s after sales support is reliable
– Which second-hand listings have been sitting unsold and why
The community knowledge here is specific to South African conditions, from dusty Highveld winds to coastal humidity. You will not find that guidance in any imported brochure.
Warranty, Shipping, and Customs Concerns
When you buy a 200mm telescope south africa from a local dealer, the warranty process is straightforward. You return the scope to the shop, and they handle the claim with the manufacturer. Some importers offer a three year warranty, but read the fine print. Shipping damage is common, so inspect the box before signing.
If you choose an overseas supplier, customs and shipping costs can add 20% to 30% to the price. The courier will charge a clearance fee, and VAT applies on the total. A damaged mirror from rough handling is a real risk, and returning it is expensive.
- Ask the dealer which warehouse stocks spare parts
- Confirm whether the warranty covers collimation adjustments
- Check if the price includes a hard case or just the cardboard box
For a 200mm telescope south africa, local support often beats a lower online price.
0 Comments