
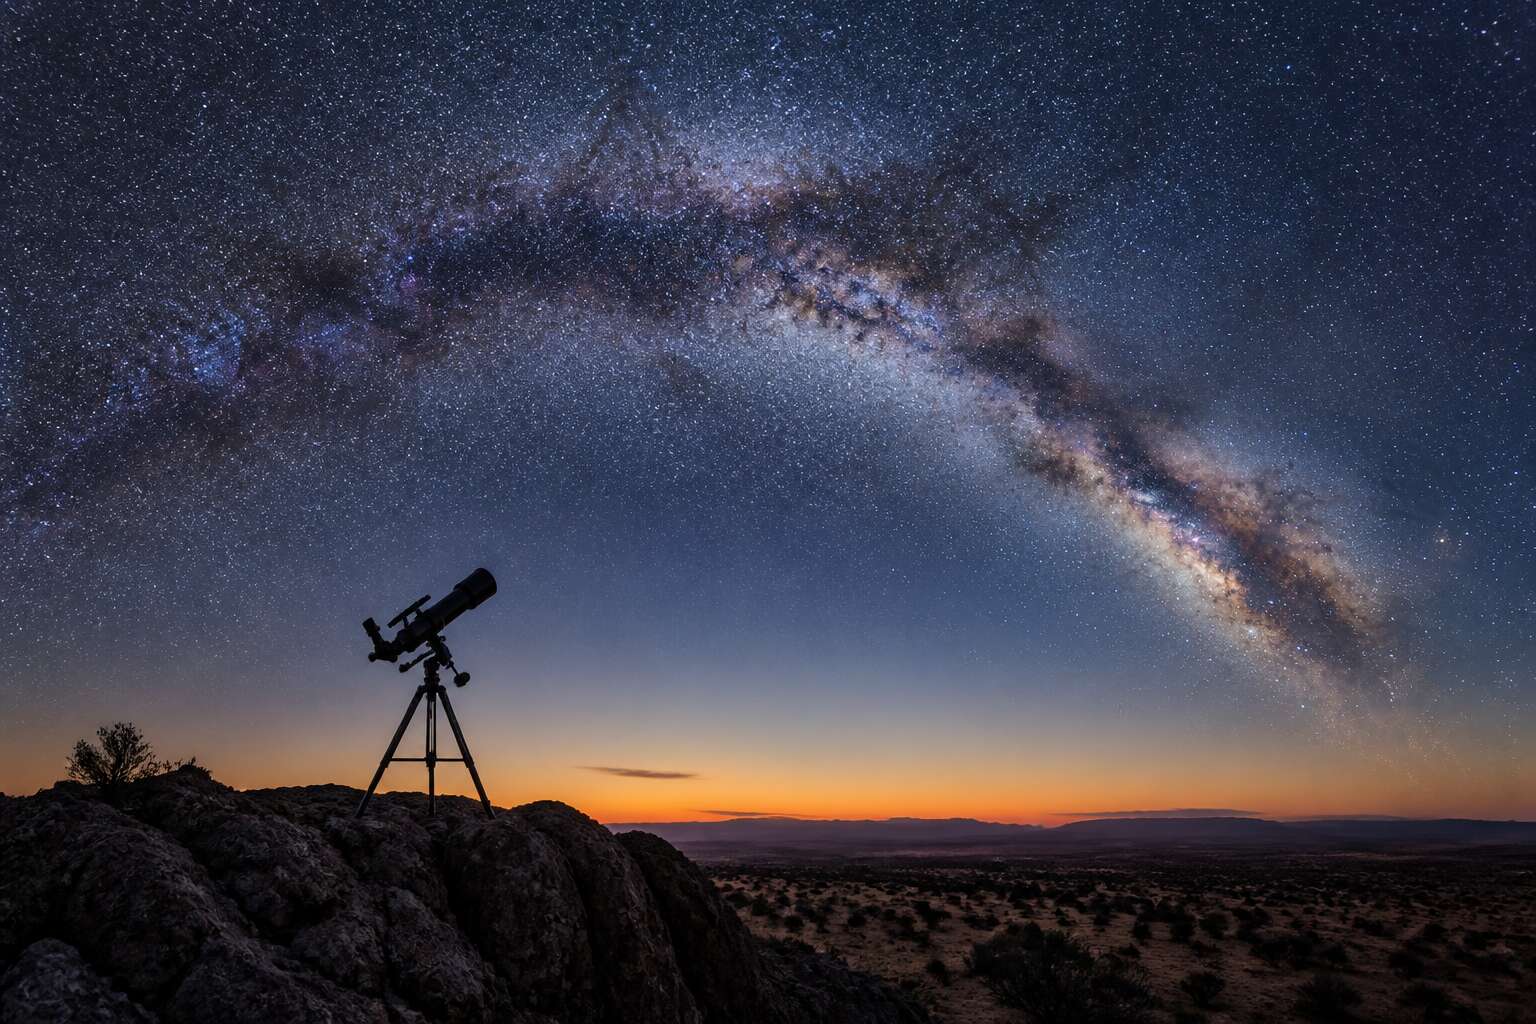
Choosing the Right Telescope for South African Skies
Understanding Aperture and Focal Length
Selecting a telescope for Southern Hemisphere skies demands attention to the Karoo’s transparent darkness and the highveld’s turbulent air. Aperture determines light gathering, while focal length dictates magnification and field of view. For deep-sky objects like the Magellanic Clouds, a wider field serves better than extreme power.
The relationship between these specifications shifts with each observing site:
- Larger apertures reveal faint nebulae but add weight and cost.
- Longer focal lengths excel at planetary detail when seeing steadies.
Amateur astronomy equipment south africa often balancest portability with performance. My 8 inch Dobsonian remains a favourite for rural and suburban use.
Refractors vs Reflectors vs Catadioptrics
In South Africa, the difference between a refractor and a reflector is not academic. Under the Karoo’s transparent canopy, a 200 mm Newtonian will outshine a 100 mm refractor on the Magellanic Clouds, yet the refractor’s contrast reveals the Orion Nebula’s tendrils with greater clarity. Catadioptrics offer a third path, mixing mirrors and lenses to shrink the tube length.
- Refractors pay for superb coatings and long tubes
- Reflectors trade compactness for larger mirrors
- Catadioptrics balance both but cost more per inch
For amateur astronomy equipment south africa, the decision leans on these trade-offs. My first telescope, a 90 mm achromatic refractor, showed me lunar rilles clearly. That instrument taught patience. For highveld turbulence, a Maksutov-Cassegrain with its closed tube resists thermal currents far better than an open truss reflector.
Mount Types: Alt-Azimuth vs Equatorial
Under the southern Milky Way, a mount matters as much as the optical tube. Alt-azimuth mounts move up, down, left and right, like a camera on a tripod. They are simple to set up and intuitive for beginners. Equatorial mounts align with Earth’s axis, allowing one motor to track stars as the sky rotates.
For amateur astronomy equipment south africa, the choice often comes down to observing style. I once spent an evening in Sutherland with a manual alt-azimuth. Finding the Coalsack was easy, but keeping it centered required constant nudges. An equatorial mount, once polar aligned on the Southern Cross, lets you follow deep sky objects effortlessly.
- Alt-azimuth: lighter, cheaper, better for casual viewing
- Equatorial: heavier, precise, ideal for astrophotography
Highveld thermals and coastal humidity also affect mount performance. A sturdy equatorial mount with slow motion controls handles these conditions better. But if you prefer hopping between star clusters without fuss, alt-azimuth serves you well. Choose based on patience and purpose.
Portable Options for Dark Sky Trips
A Karoo sky will ruin a city astronomer for life. The Milky Way spills from horizon to horizon. Amateur astronomy equipment south africa must survive dust roads, sudden winter chills, and the occasional curious sheep.
Portability is the deciding factor for dark sky trips. A hefty dobsonian wins on light gathering, but you will not enjoy wrestling it into a caravan. Look for a collapsible tube or a small refractor that fits under an airplane seat for Sutherland.
When packing for a weekend under the stars:
- A red flashlight with a dimmer
- A dew shield for Karoo cold
- A small table for a tabletop scope
A quick setup lets you chase the Magellanic Clouds before bedtime. Choose the telescope you will actually carry, not the one that impresses at a braai.
Essential Accessories for Southern Hemisphere Viewing
Eyepieces and Barlow Lenses
Southern hemisphere observers see the Large Magellanic Cloud and the Small Magellanic Cloud. A quality eyepiece makes the difference. For amateur astronomy equipment South Africa, start with a 25mm eyepiece for wide fields, then add a 9mm for lunar detail. I always recommend testing under the Cape’s crisp air.
Barlow lenses multiply your existing eyepieces. A 2x Barlow with a 12mm eyepiece acts as a 6mm, which helps when viewing the Eta Carinae Nebula. Keep these points in mind:
- Optical quality matters more than magnification
- Check the barrel size matches your diagonal
- A short Barlow works best for slow telescopes
Try this combination during a winter Milky Way session, and you will see why accessories are essential for southern sky observation.
Filters for Nebulae and Galaxies
When that small, fuzzy patch in your eyepiece refuses to resolve into a galaxy, the culprit is often light pollution or the Moon’s glare. Filters are the unsung heroes for southern hemisphere observing, particularly when you are hunting the faint glow of the Large Magellanic Cloud from a suburban backyard in Gauteng. A simple broadband filter will cut the sodium and mercury vapor from streetlights, allowing you to finally see the structure in the Tarantula Nebula. For the Eta Carinae Nebula, an OIII filter is the secret weapon.
The trick is knowing that these filters work with your telescope, not your camera. Before you purchase amateur astronomy equipment South Africa suppliers stock, check the filter thread size. Most eyepieces use a 1.25 inch or 2 inch format, and adapting a small filter to a large eyepiece causes vignetting. If you are viewing from a dark site in the Karoo, you might not need a filter at all. But for those who observe from the city periphery, the contrast gain is worth the cost.
– UHC filters enhance faint emission nebulae like the Lagoon Nebula.
– OIII filters target planetary nebulae and supernova remnants with precision.
– Broadband filters work best for reducing general sky glow without dimming stars.
Remember that a filter cannot save a poor mount alignment, but it will make your equatorial mount tracking feel more rewarding when you hold the view steady. The key is to buy one good filter instead of several cheap ones. Start with an OIII filter to tackle the brighter southern nebulas, and you will be surprised by how much detail was hiding in plain sight.
Star Diagonals and Finderscopes
Star diagonals and finderscopes rarely get the attention they deserve. A 90 degree diagonal is a necessity for southern hemisphere viewing, since many targets like 47 Tucanae sit near the zenith. Without one, you are kneeling or crouching in awkward positions. A correct image diagonal also makes navigating the sky feel intuitive.
Finderscopes are the reason you can actually find those targets. A red dot finder is fast, but a right angle finder is more precise for faint objects. When you shop for amateur astronomy equipment South Africa, match the finder to your telescope’s aperture. This avoids fruitless scanning.
- Confirm the diagonal fits your focuser, usually 1.25 or 2 inches.
- Make sure the finder shoe is compatible with your scope.
The best mount and eyepiece collection will not help if you cannot point the telescope in the first place.
Collimation Tools for Reflectors
If your reflector’s mirror alignment drifts, even the finest eyepiece collection will deliver soft, mushy stars. Collimation transforms a good telescope into a precision instrument. For observers in the Southern Hemisphere, where the Tarantula Nebula and the LMC demand clean optics, proper alignment is non-negotiable. A laser collimator simplifies the process, but a Cheshire eyepiece is a reliable, battery-free backup. I find that checking alignment at the start of every session prevents frustration later.
When you purchase amateur astronomy equipment south africa, consider these collimation essentials:
– A laser collimator for quick rough alignment.
– A Cheshire eyepiece for precise final adjustments.
– A collimation cap for a fast check between targets.
Thermal shifts from cool Cape evenings can knock mirrors out of whack. Building a quick routine protects your views. A properly collimated scope reveals the intricate structure of planetary nebulae and the faint tendrils of galaxy arms. Without it, you are simply guessing. Mastering this skill makes your amateur astronomy equipment south africa purchase work harder for you.
Red Flashlights and Observing Chairs
Some argue the southern sky’s true luxury is not aperture, but the patience to see it properly. Nothing destroys that patience faster than losing your night vision to a phone screen or succumbing to a stiff back after ninety minutes at the eyepiece. When you assemble your amateur astronomy equipment south africa kit, these two unglamorous items deserve far more respect than they typically receive.
A red flashlight is the social lubricant of any observing field. White light is a declaration of war against every dark-adapted eye within a hundred metres. The dim red glow preserves your rods and cones while allowing you to fumble through your eyepiece case without swearing. The Magellanic Clouds and the sprawling glow of the Milky Way’s core demand fully dark-adapted pupils, so protect them fiercely. A headlamp with a dedicated red mode is superior because it keeps both hands free for adjusting a focuser or swapping charts. Choose one with a dimmer switch, because even red light can be too bright after an hour in the dark.
The observing chair is the true mark of a seasoned observer. Standing hunched over for hours is a youthful mistake. A proper adjustable chair, the sort that allows you to sit at the correct height for any target, transforms the experience. Consider what you need it to do:
– Adjust height quickly whenever your telescope moves.
– Provide a stable base without wobbling.
– Fold or disassemble for your car boot.
Without this simple furniture, your neck and knees will negotiate an early retirement long before the seeing conditions improve. The purchase of amateur astronomy equipment south africa is rendered pointless if you cannot physically endure the session. A comfortable observer notices the delicate contrast differences in the Eta Carinae Nebula or tracks the moons of Saturn with greater precision. These are the quiet companions to your expensive optics, and they cost very little in comparison. They make you a better astronomer by making you a more comfortable one.
Solar Viewing Safety and Solar Filters
Nearly 75% of the southern sky’s deep sky objects sit below the celestial equator. Your amateur astronomy equipment south africa kit needs a planisphere set for 35 degrees south to locate them. For solar viewing, safety overrides everything. The Sun can permanently damage your retina in a fraction of a second. Use only filters that block 99.999% of sunlight before it reaches the eyepiece. There are two proven types:
- Full aperture white light filters using Baader AstroSolar film
- Hydrogen alpha scopes with built in blocking filters
Screw these on securely and check for pinholes every session. The amateur astronomy equipment south africa market carries trusted brands like Lunt and Celestron. Never improvise with smoked glass or photographic film. The southern Sun offers exceptional views of granulation and sunspots when you do it right. Your patience will be rewarded with detail most observers never see.
Where to Buy Amateur Astronomy Equipment in South Africa
Leading Local Retailers and Online Stores
Finding the right place to buy telescopes and accessories in South Africa takes more than a quick Google search. The market for amateur astronomy equipment south africa is small, but it’s supported by a network of dealers who understand local conditions and shipping realities.
The most useful outlets fall into a few groups:
- Independent telescope specialists based in Cape Town and Johannesburg, often run by experienced observers.
- Online stores that carry international brands, with warranties valid across the country.
- Forum-backed classifieds where used equipment appears at fair prices.
Shopping locally means you can inspect gear before paying, and you avoid the import duties that push up prices. Online shops, meanwhile, often stock more advanced items than display rooms can carry. For a growing hobby, both options serve a purpose.
Considering Import Duties and Shipping Costs
Import duties add a hefty margin to any international order. A telescope priced at R6,000 overseas can land at your door for R8,000 or more after VAT and customs fees. That reality shapes how most people purchase amateur astronomy equipment south africa.
Buying locally removes the guesswork. You pay the shelf price and walk away. But local stock is limited. Specialty items often require special orders anyway.
For anything sourced abroad, the final price depends on a few variables. Some couriers charge flat clearance fees that dwarf the actual duty. Others bundle taxes into a single shipping quote. The declared value also matters.
A typical landed-cost breakdown looks like this:
- International shipping per kilogram.
- 15% VAT on the total.
- A customs clearance fee of R75 to R500.
- Import duty depending on the category.
A R6,000 refractor can easily become an R8,000 purchase before it reaches your doorstep! The cheapest listed price is rarely the cheapest final price.
Second-Hand Market and Astronomy Clubs
When searching for amateur astronomy equipment South Africa, the second-hand market deserves close attention. I have found that joining a local astronomy club provides two benefits: access to experienced observers and access to members who periodically sell scopes they are upgrading. A used reflector or refractor often changes hands for half its original price.
The best part? You can inspect the optics before paying. Some sellers will meet at a club observing night, letting you test the scope under real stars. Online classifieds carry listings, but the most useful purchases come from a personal handover.
The former owner can demonstrate setup and share tips alongside the eyepieces. That practical knowledge is absent from retail stores.
Warranty and After-Sales Support
A private handover, scope in the boot, loses its charm when the focuser jams three weeks later. No warranty follows that telescope home. The formal retail channel justifies its margins here.
Reputable stores selling amateur astronomy equipment South Africa provide written warranties covering manufacturing defects and mechanical failures. After-sales support extends beyond paperwork. A shop that collimates your mirror, sources a replacement eyepiece, or takes your call on a frustrating Saturday night holds genuine value. Imported scopes bought online may arrive cheaper, but a fault means courier costs and long waits.
Warranty documentation sets the boundaries. Typical coverage includes:
- Optical components such as lenses and mirrors
- Electronic hand controllers and GoTo motors
- Shipping costs for repairs
- Transferability to a new owner
Those buying amateur astronomy equipment South Africa from a store with a service department encounter fewer problems when components fail. The retailer stocks spares and employs technicians familiar with local conditions.
Evaluating Light Pollution and Observation Sites in South Africa
Finding Dark Sky Reserves in South Africa
South Africa’s interior offers some of the most transparent skies on the planet, but finding them requires more than a glance at a map. Evaluating light pollution demands attention to the Bortle scale, prevailing weather patterns, and the direction of the nearest urban glow. The Karoo region, particularly around Sutherland, is a prime target for serious observers.
When scouting a site, consider the following:
- Distance from major metropolitan hubs like Cape Town or Johannesburg
- Altitude and atmospheric stability, which directly affect seeing conditions
- Seasonal cloud cover and prevailing wind directions
Dark sky reserves such as the !Kheis Karoo Conservancy and the Namakwa region offer protected darkness, and their remoteness pays dividends in the eyepiece. Choosing amateur astronomy equipment south africa should always include a plan for where you will actually use it, since even a premium telescope performs poorly under skyglow.
Using Bortle Scale and Light Pollution Maps
Less than 20% of South Africans can see the Milky Way from their backyards. That statistic explains why evaluating observing sites matters as much as selecting the telescope. The Bortle scale, a nine step classification, turns subjective darkness into a measurable standard. Class 1 skies reveal zodiacal light in detail, while Class 8 or 9 urban skies turn the Moon into a washed out glare.
Light pollution maps, such as those on lightpollutionmap.info, overlay satellite data onto South Africa’s geography. These tools identify the Orange River basin and sections of the Karoo as dark corridors, and I have found them remarkably reliable in the field. For anyone researching amateur astronomy equipment south africa, these maps are the starting point. A site’s Bortle class, however, is not sufficient on its own. Prevailing winds, seasonal haze, and the altitude of nearby mountain ranges influence what a telescope can resolve.
Under Bortle 5 skies, a modest 8 inch reflector reveals the North America Nebula with a UHC filter. Under Bortle 8, the same aperture barely detects the Orion Nebula’s core. Choosing amateur astronomy equipment south africa requires this context.
Tips for Urban Observing and Balcony Setups
Most urban observers never see the Milky Way. A balcony in Johannesburg can still reveal the Orion Nebula if you control glare. The building itself becomes a shield. Walk around your balcony at night and trace where every light pools.
Evaluating a site involves more than a Bortle number. A neighbour’s security beam changes what your equipment resolves. When comparing amateur astronomy equipment south africa, ask about slow motion controls. They allow precise corrections on a moving tripod.
- Face the darkest corner.
- Deflect streetlight with a sunshade.
- Keep the eyepiece side away from the wall.
Balcony setups demand flexibility. A solid table beats a flimsy tripod. Foam pipe insulation on the railing reduces vibration. Test on the Moon first.
Budgeting and Upgrading Your Equipment
Entry-Level Starter Kits Under R5000
Here is a comprehensive article about amateur astronomy equipment in South Africa, written with SEO optimisation in mind.
—
Amateur Astronomy Equipment South Africa: Your Guide to Stargazing
The Southern Hemisphere offers a celestial spectacle that northern observers can only dream about. From the Magellanic Clouds to the heart of the Milky Way, the skies above South Africa are a natural treasure. Yet, for many beginners, the journey into amateur astronomy equipment South Africa can feel overwhelming. The market is full of technical jargon and expensive promises. This guide aims to demystify the process, helping you choose the right gear for your budget and your observing goals.
Budgeting and Upgrading Your Equipment
Before you spend a single Rand, you need to understand one fundamental truth about this hobby. Your budget is not just about the telescope itself. A common mistake is to purchase a powerful tube and then have nowhere stable to put it. The mount is arguably more important than the optics, as a shaky base will ruin the view of any planet or deep-sky object.
A realistic budget should account for a few essential accessories. You will need at least two eyepieces, a finderscope or red dot sight, and possibly a moon filter. If you live in a city like Johannesburg or Cape Town, light pollution is your biggest enemy. Consider a light pollution filter as a worthwhile investment. For those planning to travel to darker sites, a portable power tank for motorised mounts is also essential.
When it comes to upgrading your equipment, think incrementally. Start with a simple, reliable scope and learn the sky. After a few months, you will know whether you prefer planetary viewing or deep-sky hunting. This experience will guide your next purchase, preventing costly mistakes. A great first upgrade is a better quality eyepiece, which can transform the performance of even a budget telescope. Only then should you consider a larger aperture or a more sophisticated mount.
Entry-Level Starter Kits Under R5000
For beginners, the idea of spending thousands on a complex rig is daunting. Fortunately, there are several excellent entry-level starter kits under R5000 that offer a fantastic introduction to the hobby. These packages are designed to be user-friendly and provide everything you need to get started on your first night out.
– The Tabletop Dobsonian: This is arguably the best value for money in astronomy. A 130mm tabletop Dobsonian, such as the Sky-Watcher Heritage series, offers a large aperture for a small price. You simply place it on a sturdy table, and the simple alt-azimuth mount is intuitive to use. It excels at showing you the Moon, Saturn’s rings, and bright deep-sky objects like the Orion Nebula.
– The 70mm Refractor: A classic choice for beginners, a 70mm refractor on an alt-azimuth mount is lightweight and portable. Brands like Celestron and Bresser offer complete kits that include multiple eyepieces and a tripod. These are perfect for quick observing sessions in your backyard. They are also great for daytime terrestrial viewing, making them a versatile family purchase.
– The Smartphone App Scope: Some modern entry-level kits now include a smartphone adapter. This allows you to use your phone’s camera to capture images of the Moon and planets through the eyepiece. While not for serious astrophotography, this feature is a brilliant way to share your new hobby with friends and family, providing immediate gratification.
When evaluating these kits, pay attention to the mount’s stability. A tripod that is too flimsy will frustrate you. Also, check the included accessories. A kit with a 10mm and 25mm eyepiece is far more useful than one with only a single high-power eyepiece. Remember that the highest magnification is not always the best. A lower power, wide-field view is often far more rewarding.
Finding Local Retailers and Support
One of the best ways to ensure success is to buy from a dedicated retailer. While international online stores offer attractive prices, the import duties and shipping costs can negate any savings. Furthermore, local retailers provide crucial after-sales support and advice. They can help you collimate a reflector, source replacement parts, or simply offer guidance on the best equipment for South African skies.
Many local astronomy clubs also have partnerships with trusted dealers. Joining a club, such as the Astronomical Society of Southern Africa (ASSA), is a fantastic way to see equipment in action before you buy. Members are often more than happy to let you look through their telescopes. This hands-on experience is invaluable when you are trying to decide between a refractor and a reflector.
Purchasing second-hand is another excellent option. There is a vibrant community of amateur astronomers in South Africa, and many are constantly upgrading their gear. Online marketplaces and club classifieds are great places to find a used telescope at a significant discount. Just be sure to ask for a demonstration or meet in person to check the optics for any damage.
Conclusion: Look Up and Enjoy
The world of amateur astronomy equipment South Africa is rich with possibilities. Whether you start with a simple pair of binoculars or invest in an entry-level telescope kit, the important thing is to get outside and start observing. The Southern sky is a vast and beautiful library, and with the right equipment, you can begin to read its stories tonight. Do not be afraid to start small. A modest telescope used regularly will bring you far more joy than an expensive instrument left in its box. So, check the weather forecast, find a dark spot, and look up. The universe is waiting for you.
Mid-Range Recommendations for Serious Amateurs
Every seasoned observer has watched a beginner’s R5,000 telescope lose its owner’s interest by March. The upgrade to mid-range amateur astronomy equipment south africa demands honest budgeting and patience. The mount deserves the most money! A solid German equatorial mount with GoTo capability will outlive three optical tubes and still fetch a fair price.
Here is a sensible allocation for this tier:
- Half the budget for the mount
- One third for the optical tube
- The remainder for a quality eyepiece and a narrowband filter
In my experience, this split feels lopsided to newcomers, but it reflects where the engineering lives. A 200mm collapsible dobsonian on a tracking platform is a favourite in this tier, as is a 127mm apochromatic refractor for crisp lunar and planetary views.
The Cost of Upgrading Mounts and Cameras
Upgrading a mount in South Africa often costs more than the telescope that sits on it. A solid German equatorial mount will set you back R30,000 or more. A dedicated astronomy camera with cooling, like a ZWO ASI294MC Pro, runs around R18,000 before filter wheels and autoguiders.
This is where many amateurs misjudge the hobby. They budget for the optical tube and forget that the mount and camera decide the final image quality. In the amateur astronomy equipment south africa market, used mounts hold their value exceptionally well. A second-hand mount from a club member can save you 40 percent, but check the worm gear for wear and the motors for stuttering.
- The electronics in a mount fail long before the bearings do
- A guide camera needs its own budget line, separate from the main camera
- Shipping a heavy mount between provinces can exceed a telescope tube’s courier cost
I have watched good cameras lose half their value in two years while the mount that carried them sold for close to the original price.
Selling and Trading Used Equipment
Selling equipment is a lesson in depreciation. Anyone who has tracked prices for amateur astronomy equipment south africa knows the pattern. A new camera loses value the moment it leaves the shop. Wait two years, and the same camera is worth a fraction of what you paid. Meanwhile, a mount with clean worm gears can sell for nearly its original price. This asymmetry is so consistent that it feels almost perverse, yet it never surprises the veterans!
That asymmetry should guide your spending. I budget for upgrades by asking one question: what will this hold if I sell it next year? The answer is usually written in the mechanics. My own experience with a mid-range setup taught me this:
- The camera lost half its value in 18 months
- The equatorial mount sold at a small loss after three years
- The eyepieces and filters stayed close to their purchase price
- The software, worthless to a second owner
Understanding these patterns makes buying more honest. You are not purchasing a tool. You are renting the difference between the new price and the used price. Compare that difference across two or three components, and the total cost of the hobby becomes clear.
Trading equipment between observers follows the same logic but adds a social layer. The buyer wants proof of care, not just a working unit. The seller wants a fair price, not a bargain hunt. When both understand what holds value, the negotiation becomes simple. That is the arithmetic of buying and selling amateur astronomy equipment south africa. Learn it, and upgrades stop feeling like a gamble.
0 Comments